Creat Cluster service
Create Cluster service
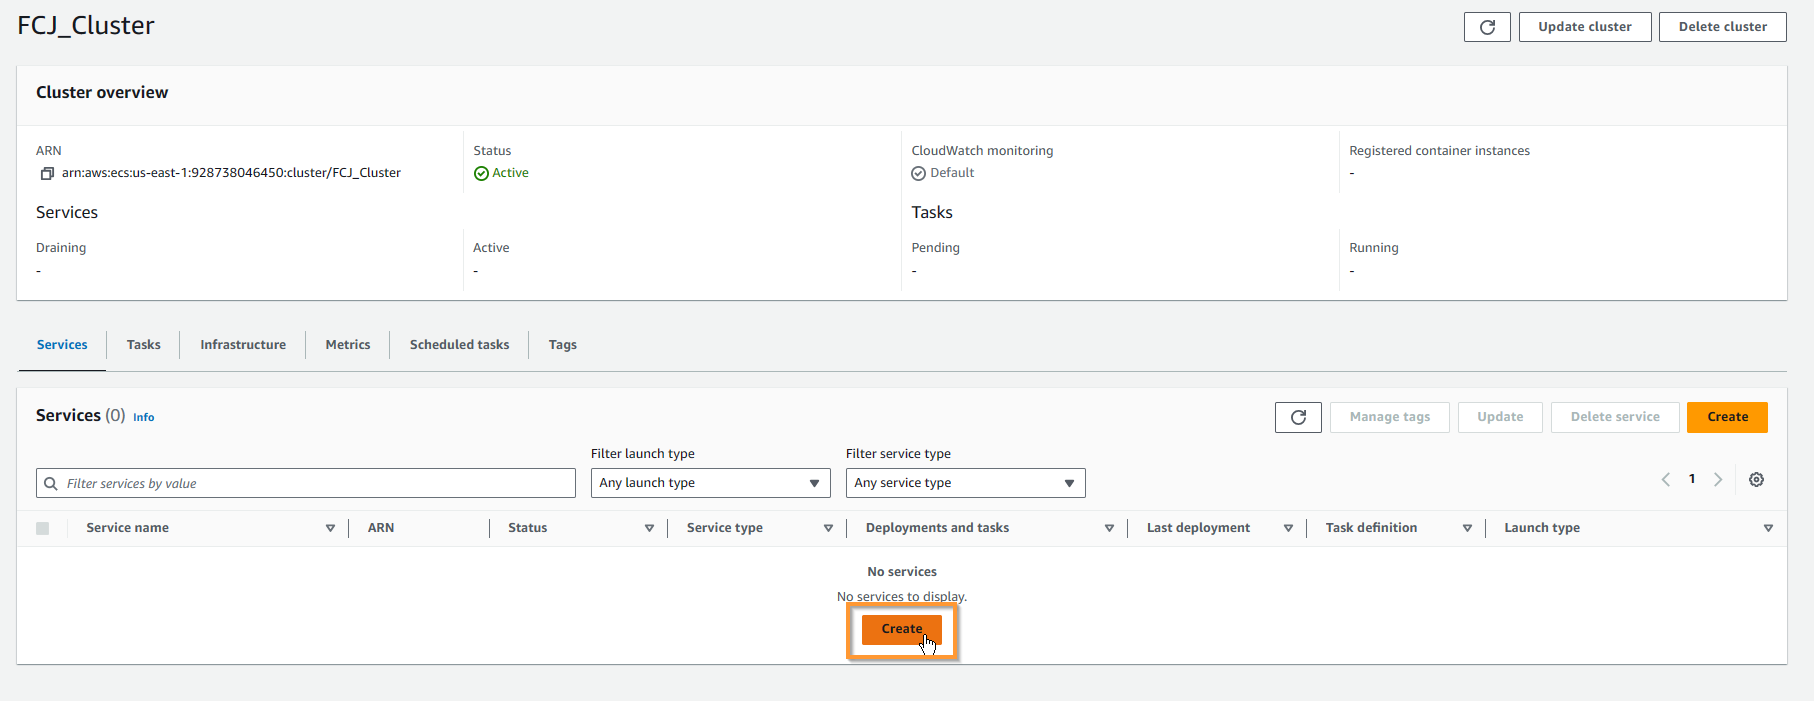
- Access to AWS ECS, select Clusters, and choose the cluster FCJ_Cluster.

- Choose Create in the Services tab.
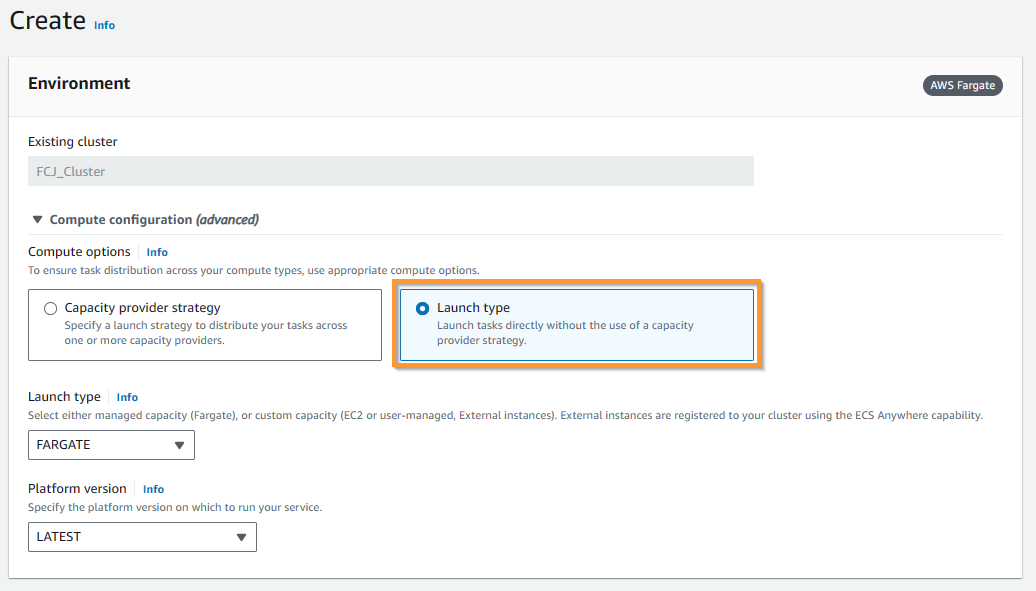
- In Compute options, choose Launch type, and select Fargate (default), Platform version is LATEST.
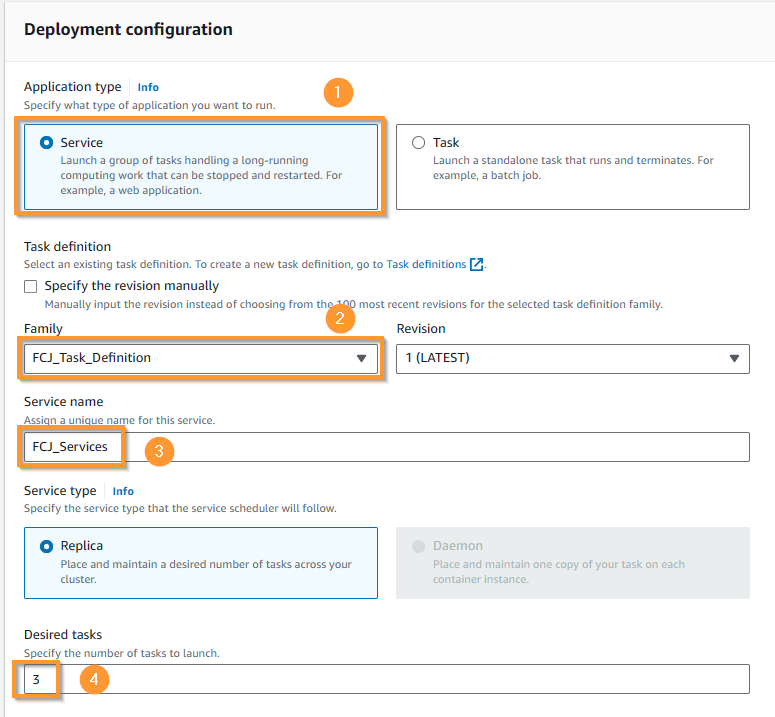
- At Deployment configuration:
- In Application type, choose Service.
- In Family, choose FCJ_Task_Definition, Revision automatically selects the LATEST version.
- In Project name, choose FCJ_Build_Project.
- In Service name, enter
FCJ_Service. - In Desired tasks, enter
3.
- Continue:
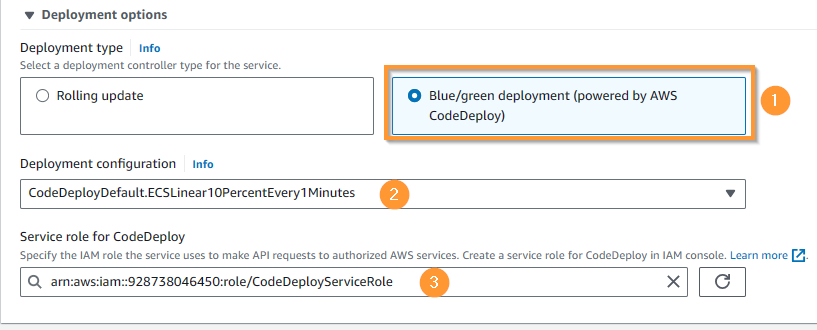
- In Deployment options, choose Blue/green deployment (powered by AWS CodeDeploy).
- In Deployment configuration, choose CodeDeployDefault.ECSLinear10PercentEvery1Minutes.
- In Service role for CodeDeploy, choose CodeDeployServiceRole.
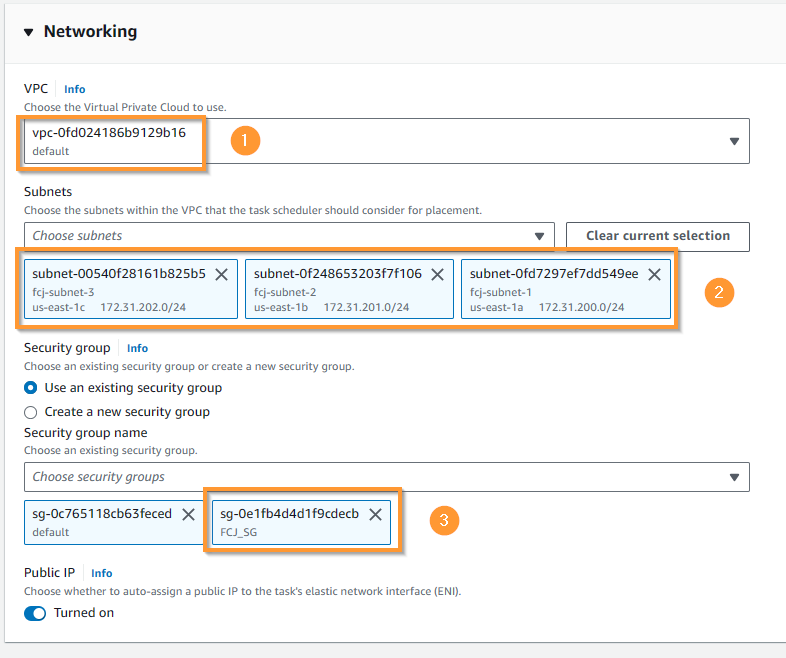
- In Networking:
- In VPC, choose Default VPC.
- In Subnets, choose 3 public subnets fcj-subnet-….
- In Security group, choose Use an existing security group, then add FCJ_SG, there will be 2 security groups as shown in the image.
- In Public IP, choose Turned on.
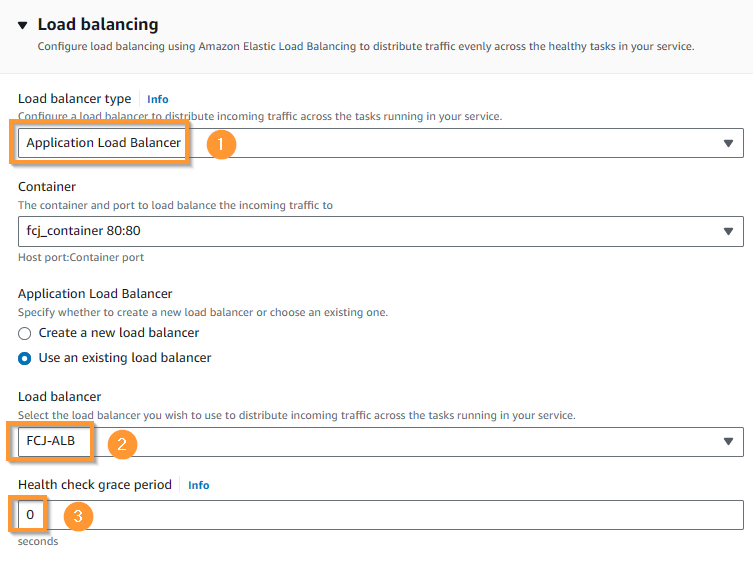
- In Load balancing:
- In Load balancer type, choose Application Load Balancer.
- In Application Load Balancer, choose Use an existing load balancer.
- In Load balancer, choose FCJ_ALB.
- In Health check grace periodInfo, enter
0.
- Continue:
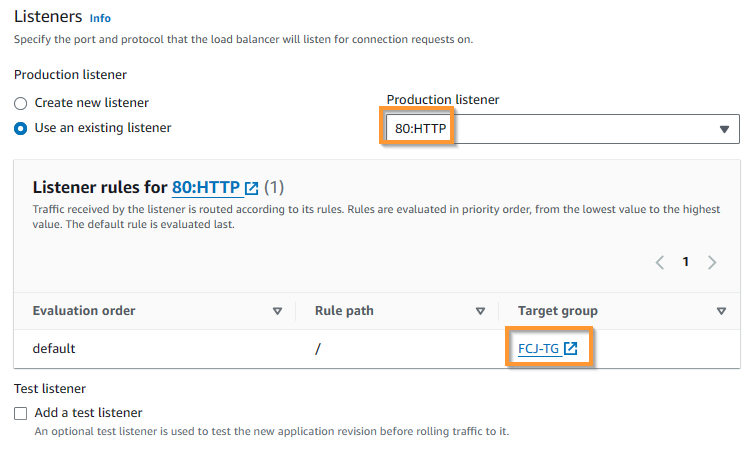
- In Listeners and Production listener, choose Use an existing listener and select 80:HTTP.
- Check target group is FCJ_TG.
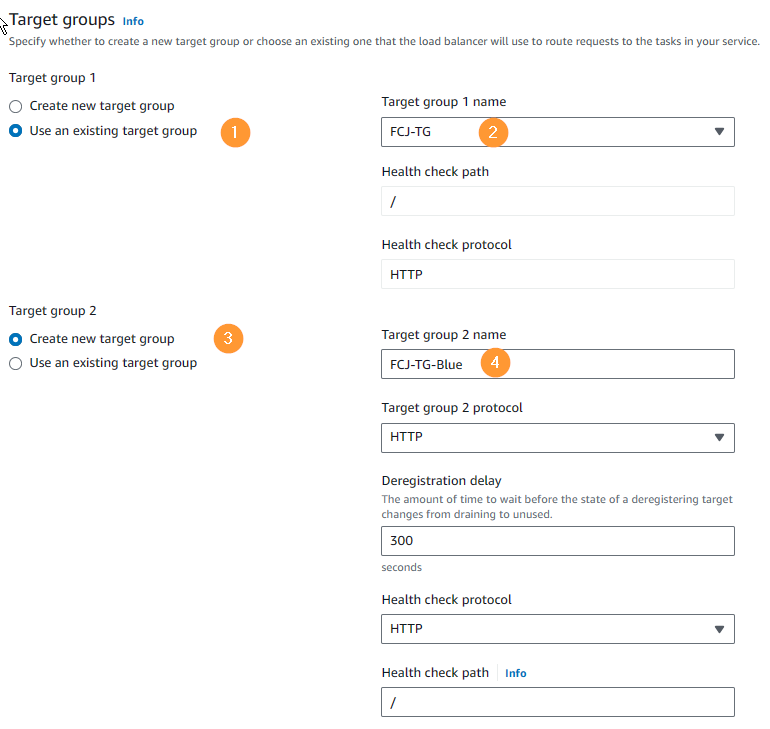
- In Target groups:
- In Application type, choose Service.
- In Target group 1, choose Use an existing target group and then choose FCJ_TG in the dropdown on the right.
- In Target group 2, choose Create new target group.
- In Target group 2 name, enter
FCJ-TG-Blue. - Then scroll down to the bottom and choose Create (not in the image).
//translate below to english
- Access to AWS CloudFormation, we will see a new stack being created, this is the stack that contains our service.

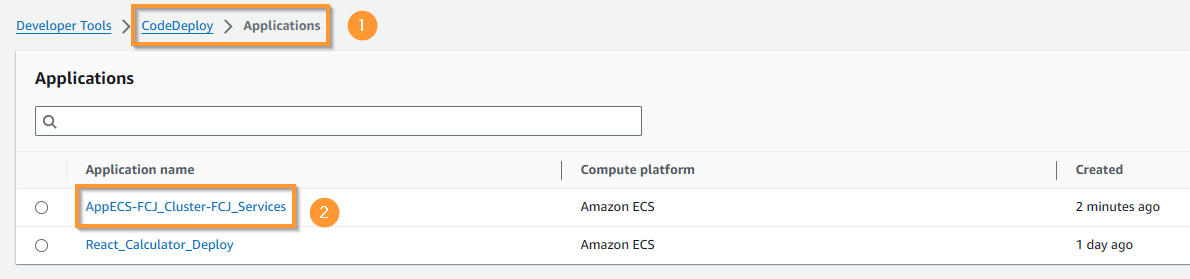
- After the stack is created successfully, access the AWS CodeDeploy service, go to Applications, we will see an application in the form of AppECS-…. This is the application that ECS uses to deploy the application. Click on the application to observe.
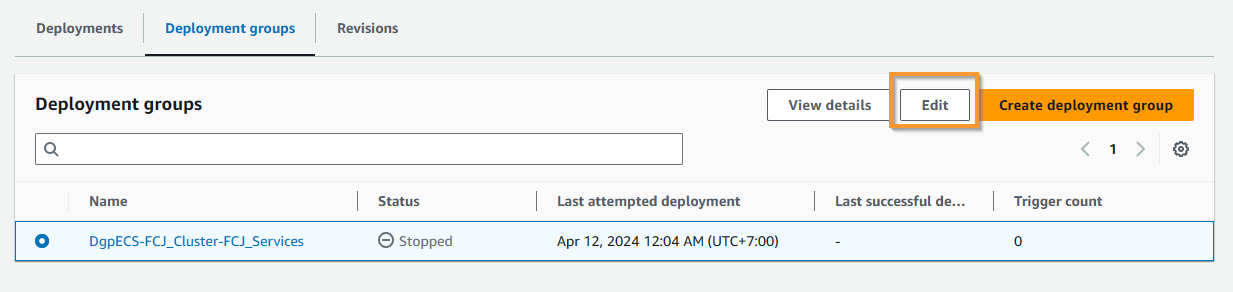
- Choose the Deployment groups tab, select the only deployment group in it, and choose Edit.
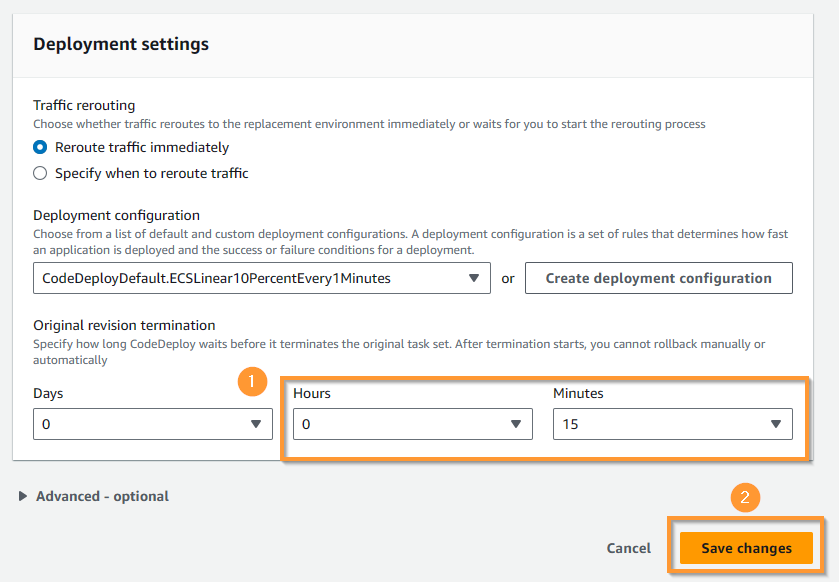
- Scroll down to the bottom, in the Deployment settings section, change the Original revision termination time to 0 hour 15 minutes as shown in the image. Press Save changes.
- Return to the ECS console, check the Services of the cluster, we will see FCJ_Service running successfully.

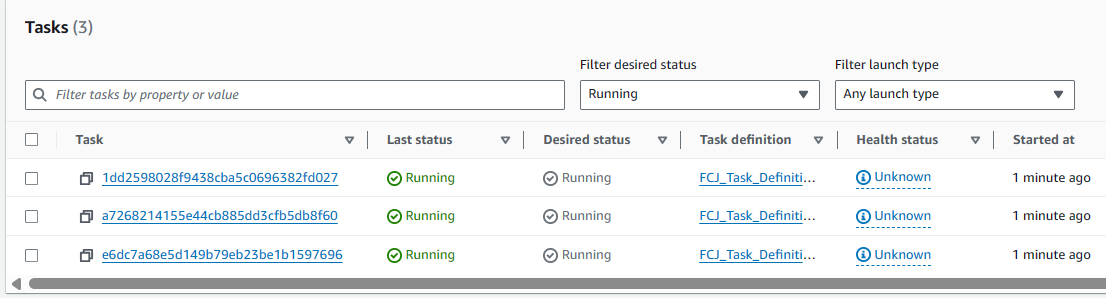
- Switch to the Tasks tab, we will see 3 tasks Running.
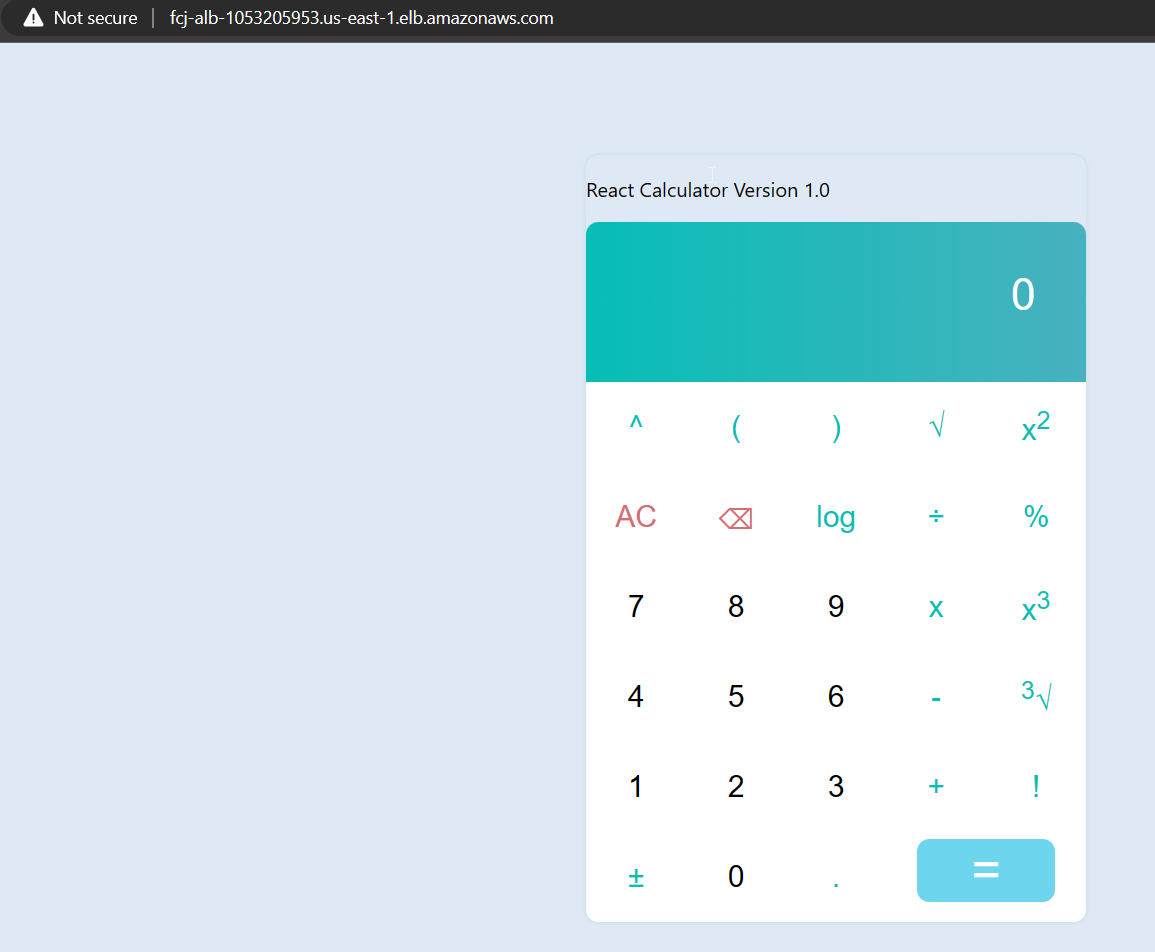
Access the AWS EC2 service, go to Load balancers, select FCJ_ALB and copy the DNS Name.
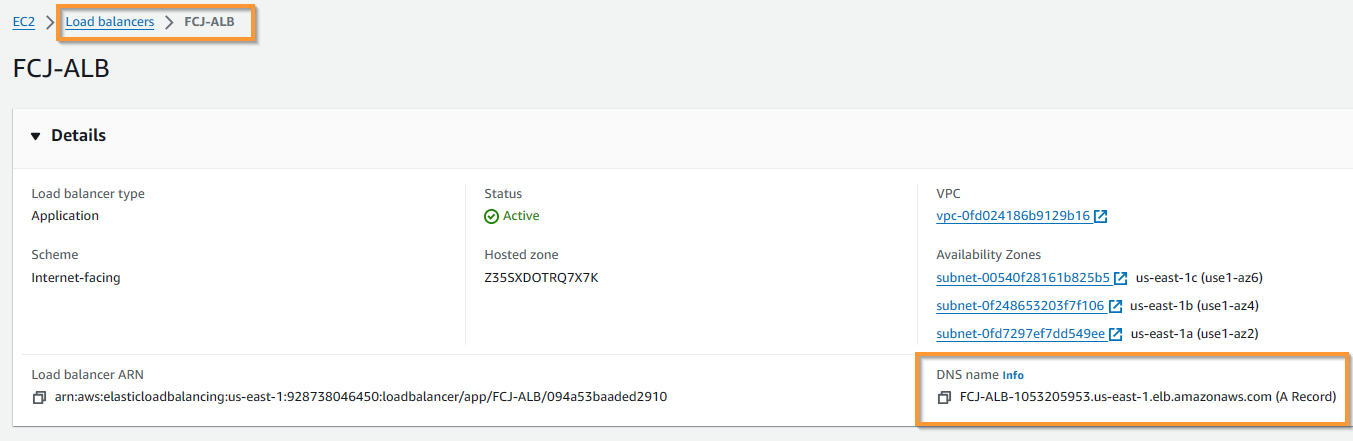
Access the DNS address of the ALB, we will be directed to the Fargate container hosting the Calculator application. Note that you will have to connect via HTTP.